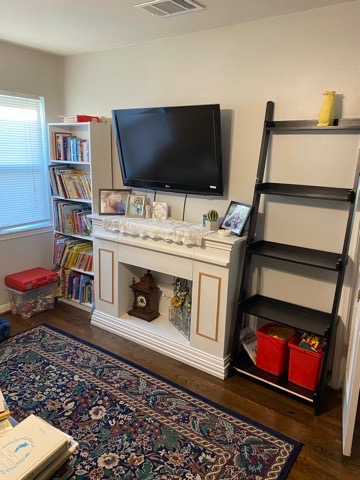
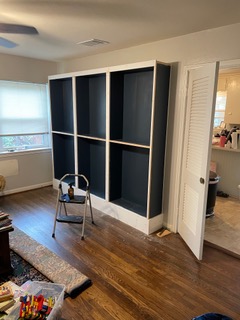
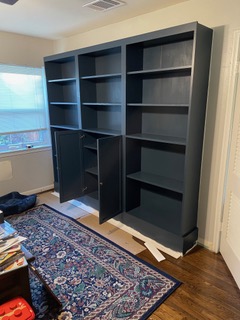
In late 2021, I decided to convert the centerpiece and the main wall in our living room to be a semi-custom built in library bookshelf using 3 IKEA billy bookcases. My wife and I had recently decided to get rid of the tv and replace it with a bookshelf. We had been deliberating about removing our tv for a while and originally were going to hire out a custom built-in bookshelf. But then we did some looking around and found a way to build one semi-custom to our needs and landed on three off-the-shelf bookshelves from IKEA. I am going to break down how I constructed this custom bookshelf faux built-in hack.
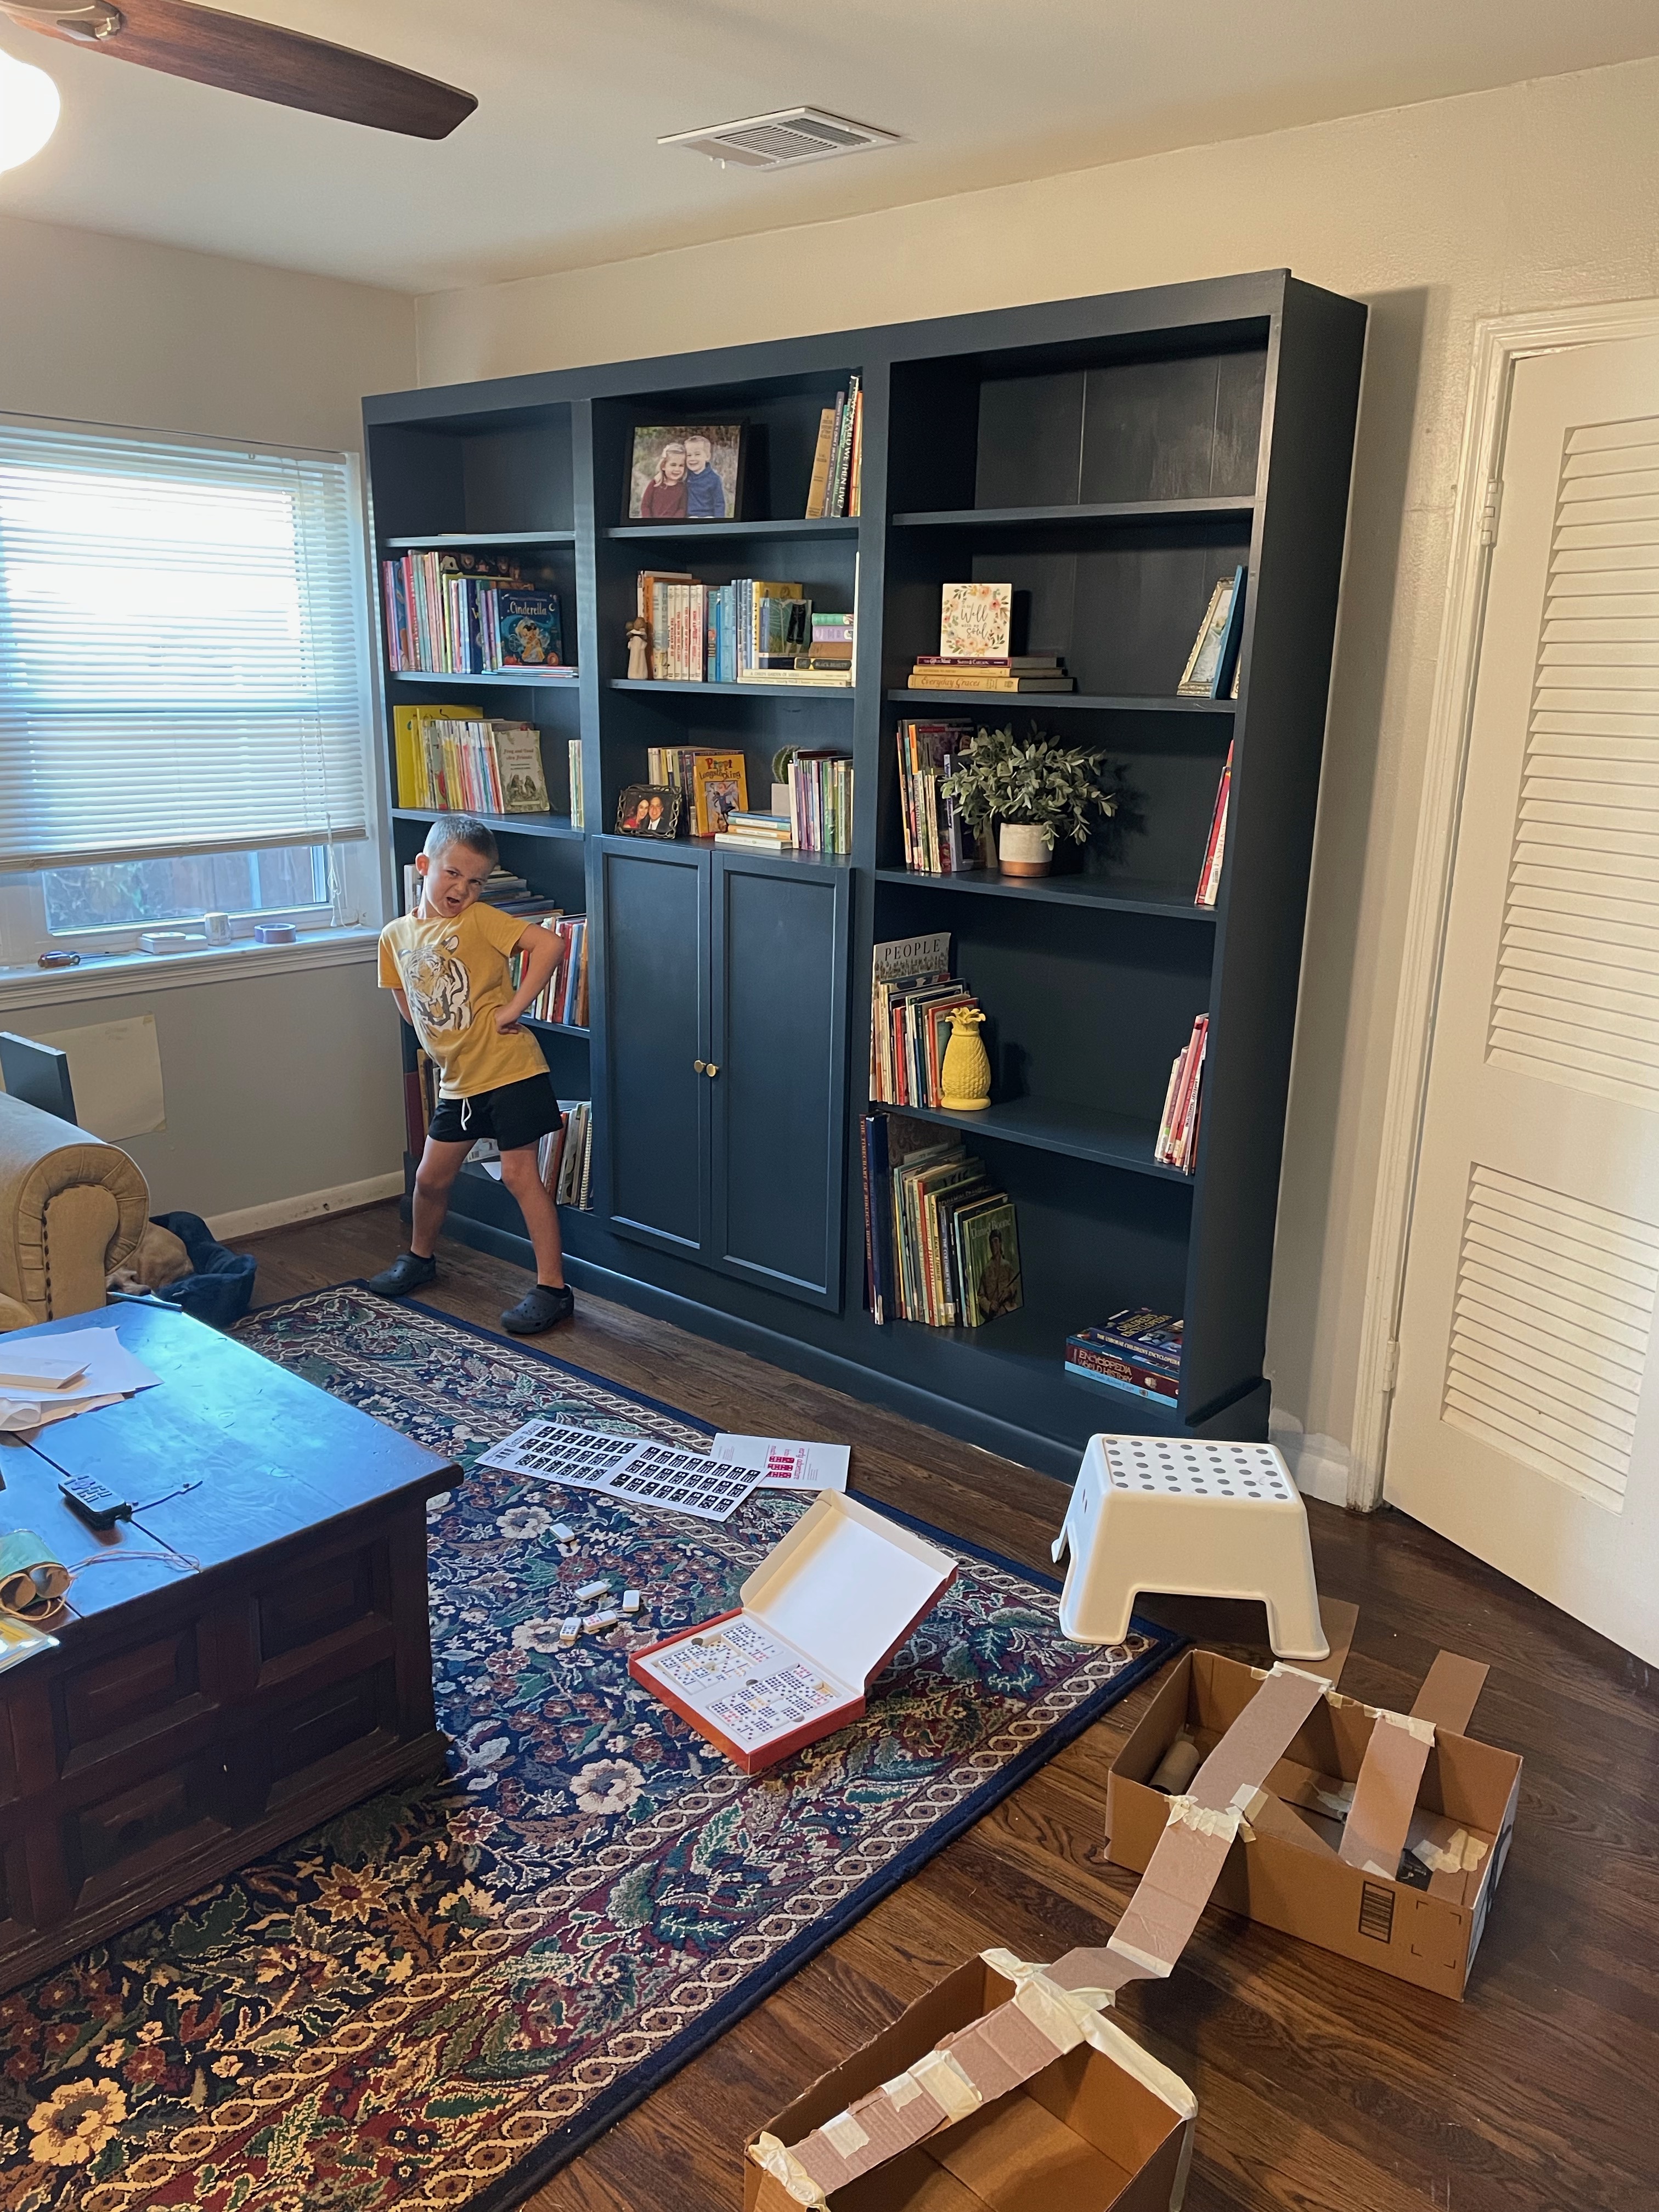
Before And After of our Built-In Semi-Custom DIY Library Bookshelf
The end project looks great and it’s practically impossible to see that it is not a fully custom bookshelf! It saved us a ton of time doing a modified, partially off-the shelf, semi-custom job rather than building it completely from scratch. We are slowly DIYing our 1950’s home in North Texas and in a small home, we are always trying to find ways to maximize the space with minimal cost.
DIY Bookshelf Project Overview
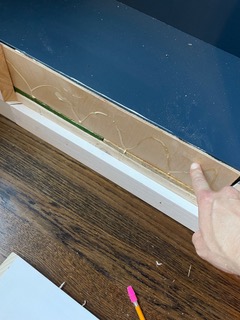
The basic jist of this DIY bookshelf project is to assemble the 3 store bought bookcases and connect them together with prefabricated 1×3 wood. Remember that 1x’s actual size is 3/4”. So, as a result of adding these, I needed to add additional 3/4” pieces of wood trim around the entire perimeter edges of the bookshelf in order for it to all be flush. That worked for everything except that the center bookshelf rows and the bottom row for the off-the shelf IKEA bookshelves had an additional 1/4” gap. So, in order to make those rows flush with all of the perimeter edges I needed to find something to handle the 1/4” gap. I was able to get a 1/4” medium density fiberboard that I cut down to make those bookshelf rows flush. I then used wood filler to fill those in so it was flush. I later sanded this so it looked natural. I was then able to add the Oxberg doors that you see in the picture over the top without any issues.
We were able to do this project with a total cost of $510, which was much better priced than what we would have spent on hiring a project like this out and made fully custom. Because most of the external surfaces of the final product were reinforced by solid wood, it looks like a solid wood piece. I also built a base that is solid wood so that I could raise the the 3 billy bookcases which gives it a solid foundation and it looks a little more grand.
Project Breakdown, Project Skill Level and Tools Used
The wall space I had to work with is essentially 9’ wide by 8’ tall. We used 3 billy bookcases from IKEA and 2 of their 15” Oxberg doors and got our wood from Home Depot to build this project out. This project is a beginner to low intermediate project. You will need a miter saw and handsaw, hand-held drill and drill bits, finishing nail gun, wood glue, measuring tape, speed square, and pencil. I also used my angled nail gun from Paslode and had 1.5” nails that I used to assemble the wood trim pieces on to the billy bookcases. I will note that I used a friend’s table saw in order to cut the 3/4″ finishing piece that went on the outside edge of the bookshelf, since that was a much longer cut and I wanted to make sure it was completely straight. But it is something that can be done extremely fast so hopefully you can find someone that will let you use there’s for 30 minutes if you don’t have one!
We modified the plans we found on Remington Avenue’s billy bookcase plans. One note is that you can really make the 1×3” boards that connect the billy bookcases bigger if you want. I went with the 3” width because I was limited with the 9’ wall width. The Remington Avenue project added extensions at the top and did a lighting fixture which I did not do because it turned out we didn’t have enough room at the top, with our 8’ tall walls. We plan to redo our living room lighting eventually anyway.
When it comes to drawers and finished pieces in your house, there is a lot of feedback across the web when doing DIY wood working projects that you needed to seal the paint with some stain in order to keep it from chipping. It would have required multiple coats so I decided not to do this. I decided against it primarily because if I wanted to change the color I didn’t want to have to sand it down and repaint it again. I would just do touchups or repaint over if it ever needed it.
Materials, Cut List and Cost Breakdown
Home Depot list:
- 6’ 1×12 select pine board
- 8’ 1×12 select pine board
- 8’ 1×6 primed pine board x2
- 10’ of 3” wide base moulding for the baseboards at the bottom of the bookshelf unit (and also used a little bit of it on the baseboard of the wall after I cut out the existing baseboards in the house)
- 7/16” OSB plywood 4’ x 8’ sheet (I had some of this laying around so I didn’t buy this…)
- 8’ 2×4 studs X 7
- 8’ 1×3 primed pine board x 3
- 1/4 2×4 medium density fiberboard
- Wood filler (used Home Depot’s plastic wood latex wood filler)
- Wood glue (used Home Depot’s titebond ii ultimate wood glue)
- White Primer (I had some of this at home…but you can buy this at Home Depot – it’s cheaper than Sherwin Williams!)
- Nylon brushes (best for water based paint) – these were a little more expensive at $17/ea with one angled brush and one 2” angled brush and one 2” flat brush
Sherwin Williams paint:
- Bought SW7615 sea serpent from Sherwin Williams with the emerald urethane trim enamel water based paint -> this is high quality paint so it was a bit more pricey at $63.97 which includes tax. One gallon was plenty for around 3 coats.
Between Home Depot and Sherwin Williams I spent $300.
IKEA list:
- 3 billy bookcases at $50/ea
- 2 Oxberg doors at $30/ea
At Ikea I spent about $230.
Amazon: My wife bought the knobs for the doors on Amazon for about $3 and we bought a cheap round doorstop on Amazon as well for $5.
$10 on Amazon
So for the full project I spent approximately $540.
Bookshelf Build Tutorial
Step #1 – Assemble the IKEA Bookshelf and Prime
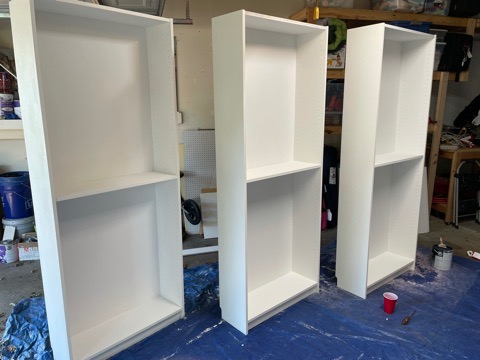
I assembled each IKEA bookshelf first and then moved them into my garage. I prepped all of my surfaces first as I knew the main job would be painting these since we went with a very dark blue color. The store-bought bookcases do need to have a primer added so that they will take the paint color if you choose to change it. I did 3 coats of primer on the shelves to ensure we wouldn’t have chipping problems later.
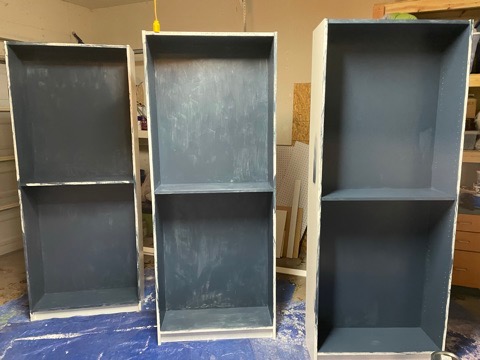
I knew that with brushes, I might end up having streaks on the bookshelves so that’s why I got a little nicer brushes for this project (though an air gun would be best). The paint job looks pretty good, even to my detailed eye. There are certainly a few paint runs on it. But I am the ultimate perfectionist, and it looks good by my standards. You just need to not be ‘globbing’ on a ton of paint at one time. So, needless to say, painting took a good while!
Step #2: Paint the Bookshelves
After I primed the bookshelves, I went ahead and painted what would be visible with 3 coats of the sea serpent blue color.
Step #3: Build the Bookshelf Base
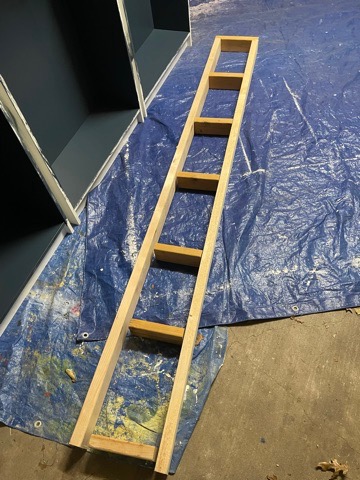
Then I built my base. The jist here is to build a base that fits the width of the 3 bookshelves as well as the 1×3″ separators. Then you want to cover up the base as well as the bottom of the bookshelf so it looks like it is one piece.
I made the base the width and depth of the bookshelves assuming the additional distance of the 1×3” connecting the 3 bookshelves. The distance in total was 96 3/4” width x 11” depth. The 11″ depth is the depth of the original bookcases. I used 2×4’s to do this and then added the OSB plywood on top of it for the bookshelves to sit on. I was meticulous on this part as it would be important to make this bookshelf look like one piece. With the 2×4’s and the additional 7/16” OSB plywood I ended at 3.75” height off the ground for the base.
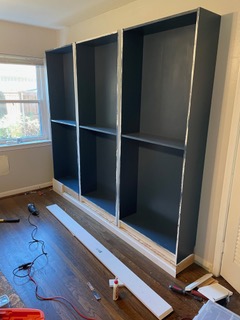
The height of the base I created and the top of the bottom bookshelf row together came to a height of 7.583″. So in order to cover the base and the base of the bookshelf, I needed the face of the base to be at least that high. I used a few prefabricated wood pieces at the bottom. I used a 1×3” at the bottom and then a 1×6” on top of it. The actual size of these two combined is 8″ because each piece is a half inch less than what is advertised. So the 8” height of this went over the top of the bottom row by a little less than half an inch. That means, it wasn’t completely flush of course but I didn’t mind having a small ‘lip’ on the bottom row of my bookshelf.
If you are debating this part of the project, the best thing is to guess about how high you want the total base to be and then build a foundation that makes it however high you want the base to be minus the 3.75″ height of the base of the bookshelf (to the top of that bottom row). So if you want it to be 10” from the ground to the top of the bottom row, you need to make a base that is 6.25″ high. You can figure out the exact height you want to cover over it as the face after you assemble if that makes it easier for you! Assemble the base first.
Once you are assembling the face, keep in mind that there is still that 1/4” gap of depth from the bottom row shelf to the face. So in order to make it flush, you need to fill in the 1/4” gap. This is where I cut out a piece from the medium density fiberboard that was exactly 1/4″. Then I glued it and nailed it with my Paslode angled nail gun! Once I was ready to assemble the face boards, I glued that side and nailed it as well. This approach worked well for me!
At this point, I finished the base face.
Since the width of the bottom is 96 3/4”, it was slightly bigger than an 8’ board that I could get at Home Depot. Rather than buying a longer board, I cut down two 8’ boards from Home Depot to make it work. This was fine because I didn’t as much additional board for this trim portion.
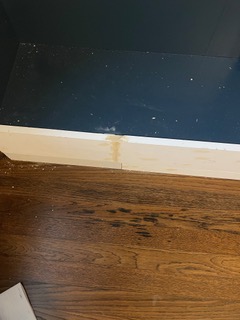
You’ll notice I put an angled cut on the board in order to connect two boards together and make it look like they were one piece. Then I put wood filler to cover the gaps. Let it dry, and sand down. Ready for primer and paint!
Step #4: Add the 3/4 Trim Pieces and All Face Boards
Then I needed to surround the whole piece with the additional 3/4 trim pieces. I did this for the outside vertical pieces and the middle row trim pieces. I used 1/3” prefabricated pieces and cut them down for this part. I cut the middle row pieces with my handsaw as straight as I could. I then borrowed a friends table saw because I didn’t want to mess those up, I wanted them to be as straight as possible. Then I tacked them on using the angled nail gun. Remember the one caveat was the middle row needed a 1/4” medium density board that I cut down into a small size and put in between my trim piece and the shelf. After that I used wood filler to make it as flush as I could – so it looked like one piece. I let it dry and then sanded it lightly until I thought it looked good enough. Then I filled all of the nail holes with wood filler or spackle.
Then for the top of the bookshelf I used a normal 1×3” prefabricated piece as the frame so it would match the width of the boards that went between the bookshelves. I solidified the piece with a 1×12” behind and flat laid down. I used this to tack on the 1×3” face and also tacked some nails that went through to the vertical bookshelf sides in order to have additional reinforcement. I wanted to make sure this bookshelf was sturdy for the long haul!
Step #5: Touchup Primer and Then Paint 3 Coats
Now we’re ready to finish out primer for the additional pieces that need it and then 3 coats of the Sherwin Williams paint.
Step #6: Paint and Assemble The Two Oxford Doors
Lastly, I needed to assemble the two doors. I decided to paint these in the garage first which took a bit of time. But the assembly was quite simple. I was concerned because I added the additional 3×4” boards on the side that this part might be difficult. But it wasn’t at all. The IKEA gave specific instructions on where to assemble the door hinges and it was pretty easy with a drill and normal drill bits to create this and assemble this part.
Step #7: Enjoy Your New Bookshelf
And there you have it! A completed, high quality looking bookshelf! It took me about a month of weekends primarily because of the amount of painting and priming. It was much faster than it would have been doing it fully custom, and certainly a lot cheaper! And now we are ready to invite books into our home and gathering room as our centerpiece rather than what was previously the tv. Learn more about why we got rid of the tv and replaced it with a bookshelf and books!
